Raspberry Pi Door Opener
New version of the project
I have done a new version of the project, you can read about it here.
Overview of the project
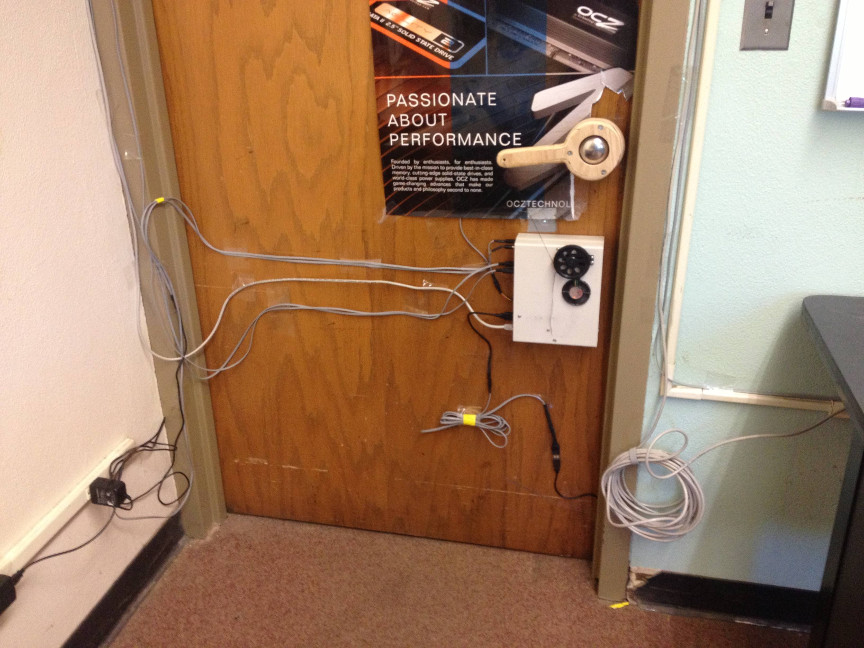
I wanted to build a door opener for my university computer club. Our office has doors that cannot be unlocked permanently, and giving out keys is problematic since it’s expensive, especially if we had to change the locks.
Therefore, it made sense to build an opener using a magnetic card reader. This makes it free to grant and revoke access at will.
Basic Parts List
- Raspberry Pi Model B
- USB magstripe reader
- Radioshack Servo (you can substitute a similar servo, it just needs to be 150 degrees or so. Most brands have identical form factors.)
- Parallax servo wheel
- Door knob extender (Assuming you are building for a round knob. I built my own out of wood for this project. If you have a lever knob, you could substitute a hose clamp to tie string on the end of the lever)
- Two DC jacks and plugs
- Micro USB cable
- Two 5 volt power supplies (for simplicity, the servo and the RPi get their own power. The RPi needs at least 700 mA. It’s better to be closer to a full one amp.)
- A project box
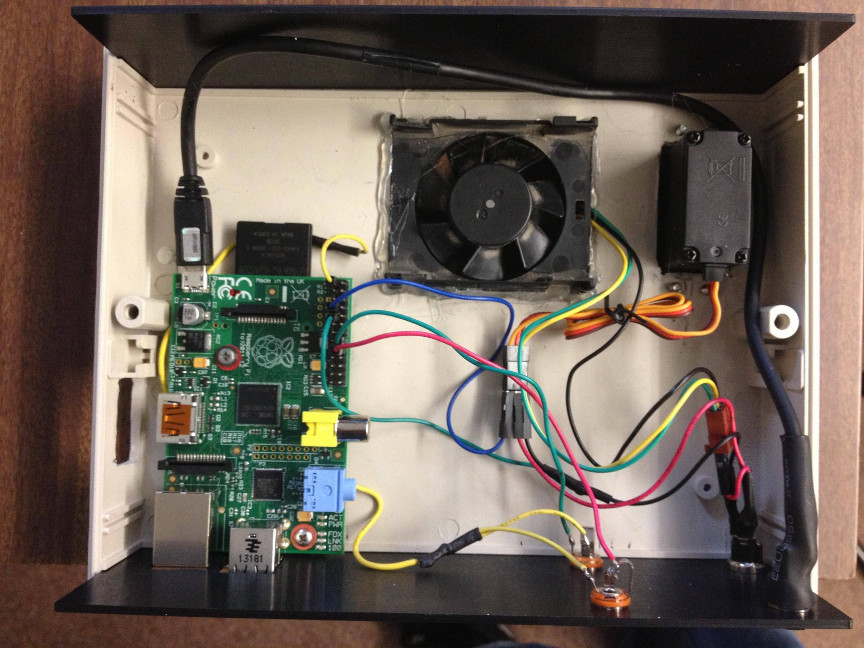 Here you can see everything wired up. The RPi is connected to the lid of the case using double sided case standoffs. This way I can remove the lid while the bottom is still attached to the door with foam tape.
Putting the parts together
One of the first things you’ll want to do is cut a groove in the servo wheel. I did it by using a hand drill as a makeshift lathe. You can use a small bolt to chuck it into the drill, and use a utility knife to carve away. This groove allows the string to ride on the wheel like a pulley.
Cutting the project box can be tricky. A dremel is useful, I then did all the fine cutting work using the utility knife to carve away plastic. You can see in the photo that mine has a fan, this isn’t strictly necessary.
As much as possible, I wanted to all the wiring to be removeable. You can see in the picture that the RPi micro USB is connected to a DC jack, as well as the servo/fan DC jack.
There are also two 1/8” mono audio jacks that are wired to magnetic sensors so the RPi can tell if the doors are closed. This data is used for an internal IRC bot for the computer club.
Powering the servo.
If you’ve using servos on a microcontroller project you can usually power them right from the dev board. Unless you have a great power supply (perhaps 1200 mA) you can’t get away with this on the Raspberry Pi.
Since this project uses seperate power supplies, the servo ground must be connected both to its power supply and to the RPi. The control is wired to a GPIO pin. Since the servo doesn’t need to precise, we can get away with the non-realtime OS on the RPi controlling it. If you need precision, you’ll want to have a microcontroller powering the servo that you can send commands to over serial.
Software
The software is all written in Python, using code written by jness on github to access the card reader. Most USB magnetic card readers act as a HID, but since this is a headless program, we can’t just read from stdin.
Controlling the servo is a pretty trivial addition to jness’s code. The authentication is done by storing a SHA 256 hex digest of the magnetic card’s input in a CSV file, along with the card owner’s name.
In the main program, we iterate through that file searching for that digest. If it’s found, we log the door opening event, and turn the servo. The build also includes red and green indicator LEDs for access denied and granted, respectively.
The software is not totally complete (or safe, it is written to require root), but feel free to clone it here. I ran it on Arch Linux ARM.